Did you know that you don’t need specialized tools like PDQ Deploy or SCCM to deploy software to your computers? That’s right if you have a Windows Active Directory Domain all you need is very simply Group Policy.
CLICK TO EXPAND
However, there are two things that catch new IT Administrators when trying to deploy software through group policy:
- While there are ways around it the first thing that you need to know about deploying software through Active Directory Group Policy the software has to be in an .MSI package. If you don’t have an .MSI, try to get one or convert your .EXE to an .MSI
- The second thing you need to know is the installer .MSI needs to be in a network location that all the users or computers can access
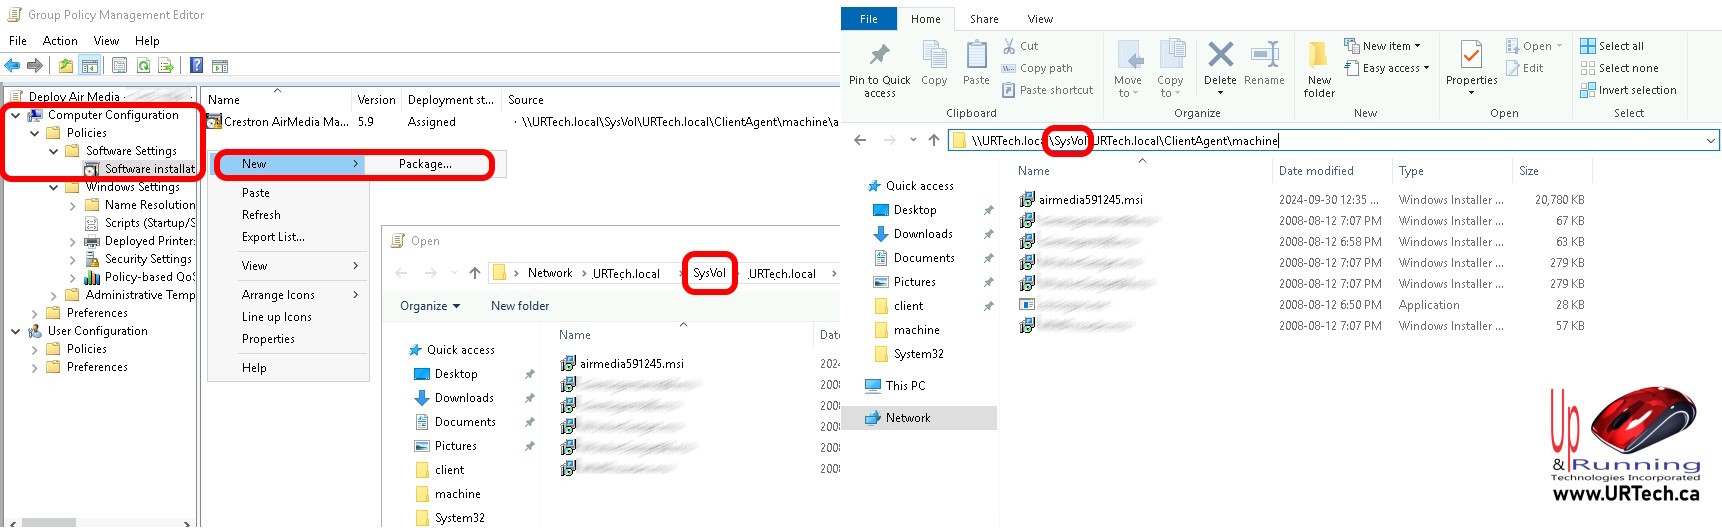
- if you are using a COMPUTER GPO (like shown in the screenshot above), you are best to put the .MSI into your SYSVOL, because the “user context” is the COMPUTER which is unlikely to have access to your shared folders
- if you are using a USER GPO, you need to be using a UNC path like \\URT-FS01\IT-Software\Installer.MSI
How To Deploy Software Using GPO
- Open Group Policy Management Console (GPMC)
- On your domain controller, open the Group Policy Management Console by typing
gpmc.mscin the Run dialog (Win + R)
- On your domain controller, open the Group Policy Management Console by typing
- Create a New Group Policy Object (GPO)
- Right-click on your domain or an Organizational Unit (OU) where you want to apply the policy, and select Create a GPO in this domain, and Link it here.
- Name your GPO (ie., “Deploy AirMedia Client”)
- Edit the GPO
- Right-click your newly created GPO and select Edit
- Navigate to Computer Configuration > Policies > Software Settings > Software installation
(or User Configuration > Policies > Software Settings > Software installation if you want to push the software to specific users instead of computers)
- Add the MSI Package
- Right-click on Software installation, select New > Package.
- Browse to the network share where your MSI file is located, using the UNC path (ie.
\\URTech.local\SysVol\URTech.local\ClientAgent\Machine) - Choose Assigned to install the software automatically at startup
- Link the GPO to the Desired OU
- Ensure the GPO is linked to the OU containing the computers you want to target. If not, right-click the OU and select Link an existing GPO


0 Comments